728x90
반응형
앞서 bottom navigationbar를 만들어보았다.
2020/10/27 - [Flutter] - [j Flutter] BottomNavigationBar 바닥메뉴 / 네비게이션바
convex_bottom_bar를 사용하여 메뉴를 좀 더 애니메이션을 줘보자.
1. convex_bottom_bar 플러그인 설치
https://pub.dev/packages/convex_bottom_bar
pubspec.yaml 안에 convex_bottom_bar 플러그인을 설치해준다.
2. Scaffold widget 안 bottomnavigationbar 부분에 해당코드를 작성해준다.
ConvexAppBar(
        items: [
          TabItem(icon: Icons.home, title: 'HOME'),
          TabItem(icon: Icons.fastfood, title: 'FOOD'),
          TabItem(icon: Icons.directions_car, title: '교통상황'),
          TabItem(icon: Icons.attach_money, title: '통행료'),
        ],
        onTap: _onItemTapped,
        activeColor: s_color,
        initialActiveIndex: _selectedIndex,
        style: TabStyle.reactCircle,
        backgroundColor: b_color,
      ),
3. body부분에 화면을 전환해주는 코드를 작성한다.
  int _selectedIndex = 0;
  static const TextStyle optionStyle =
      TextStyle(fontSize: 30, fontWeight: FontWeight.bold);

  void _onItemTapped(int index) {
    setState(() {
      _selectedIndex = index;
    });
  }

  final listWidgets = [
    Text(
      'Index 0: Home',
      style: optionStyle,
    ),
    Text(
      'Index 1: Business',
      style: optionStyle,
    ),
    Text(
      'Index 2: School',
      style: optionStyle,
    ),
    Text(
      'Index 3: School',
      style: optionStyle,
    ),
  ];
body: listWidgets[_selectedIndex],

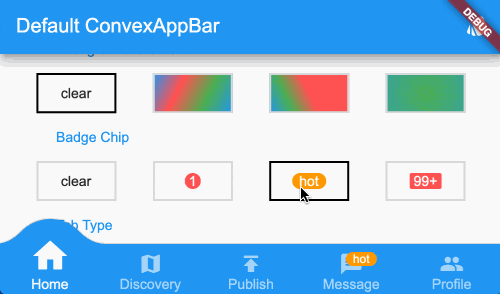
***메뉴에 new / 1+ 등 아이콘 표시를 해줄수도있다.
ConvexAppBar.badge({0: '99+', 1: Icons.assistant_photo, 2: Colors.redAccent},
  items: [
    TabItem(icon: Icons.home, title: 'Home'),
    TabItem(icon: Icons.map, title: 'Discovery'),
    TabItem(icon: Icons.add, title: 'Add'),
  ],
  onTap: (int i) => print('click index=$i'),
);
{0: '99+', 1: Icons.assistant_photo, 2: Colors.redAccent} 부분에 해당 index번호를 써주면된다.
728x90
반응형
'Flutter' 카테고리의 다른 글
| [j Flutter] 갤러리/앨범에서 사진가져오기 & 카메라 실행 (0) | 2020.10.30 |
|---|---|
| [j Flutter] 금액 콤마 / 숫자 3자리마다 (,) 표시 (0) | 2020.10.29 |
| [j Flutter] BottomNavigationBar 바닥메뉴 / 네비게이션바 (0) | 2020.10.27 |
| [j Flutter] Vertical viewport was given unbounded height 에러 처리 (0) | 2020.10.26 |
| [j Flutter] GoogleMap 추가하기 (지도추가하기) (0) | 2020.10.22 |
